Few words about Expo and ExpoKit
1st – Diatom is a company providing professional React Development Services as well as other development services and I will explain below all the details.
I will start this article with a quick note about the most powerful technologies to build applications for iOS and Android.
In the documentation for Expo, the developers have explained, “The Expo SDK is a set of libraries written natively for each platform, which provides access to the device’s system functionality (things like the camera, push notifications, contacts, local storage, and other hardware and operating system APIs) from JavaScript. The SDK is designed to smooth out differences in platforms as much as possible, which makes your project very portable because it can run in any native environment containing the Expo SDK.”
The documentation mentions that “Expo provides UI components to handle a variety of use-cases that almost all apps will cover but are not built into React Native core, e.g. icons, blur views, and more.” Expo is used by 75,780 developers. It has 6,481 stars on GitHub and 297 contributors”.
“ExpoKit is an Objective-C and Java library that allows you to use the Expo platform and your existing Expo project as part of a larger standard native project — one that you would normally create using Xcode, Android Studio, or react-native init.”
Expo covers application needs and has the ability to interact with iOS and Android development all in one place. In some cases, Expo is a very powerful framework that handles everything. Developers don’t need to have experience with Xcode or Java (Android Studio). All the magic happens in the Expo terminal. But if the project starts growing and customers need specific functional solutions, Expo doesn’t yet cover everything. It becomes a nightmare to find a solution without native code. After a lot of discussions, Expo built middle-ware between its own product and native code: ExpoKit. ExpoKit gives developers the ability to work with Expo modules.
There are a lot of advantages and ways to use ExpoKit, but I will focus on one very important tool: ejection. Developers don’t often migrate to ExpoKit because they worry it will break their current application and that it will take time and money to resolve conflicts and prepare the iOS and Android environments. There are a lot of articles online about how to eject, but they don’t cover the tricks and steps that make the process of ejection as simple as possible.
Expo Eject
The first important thing you should know is that you can revert all changes after ejection, but I suggest you do all this manipulation in different git branches.
The first step is to go to your project and type the following into the terminal: expo eject. Expo will ask you to choose a way to eject.

Choose ExpoKit. Expo will start to build two new folders, iOS and Android, and generates all the necessary configs for both platforms. The next step is to check package.json, where you should see some changes.

Move to the terminal and run yarn install (yarn is more commonly used with React Native projects).
Let’s also take a look at our app.json. You will see something new and not quite understandable. The first indicator that everything is going well will be these lines.
This means that ejection has completed, and it takes the latest ExpoKit for iOS and Android.
In the Android section, we get two new lines.

These files are very important. They will show all of your assets generated and compressed.
Android is broken
The first problem is waiting for us in the Android folder. Let’s try to find the new files from app.json in the Android section. You will see this:
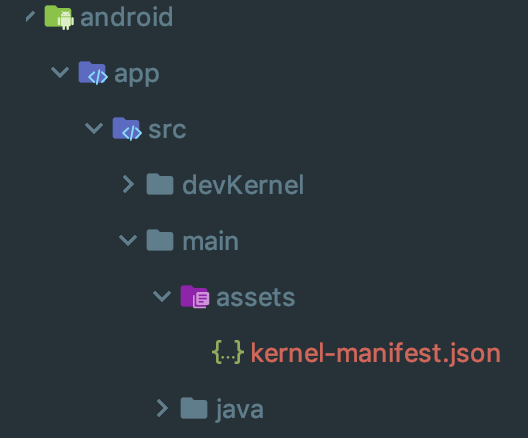
Where are your files? In the documentation, it says that you should open Android Studio, and Gradle will build the project automatically without causing any problems. Let’s try it and see what happens.
The first message will be shown almost immediately.
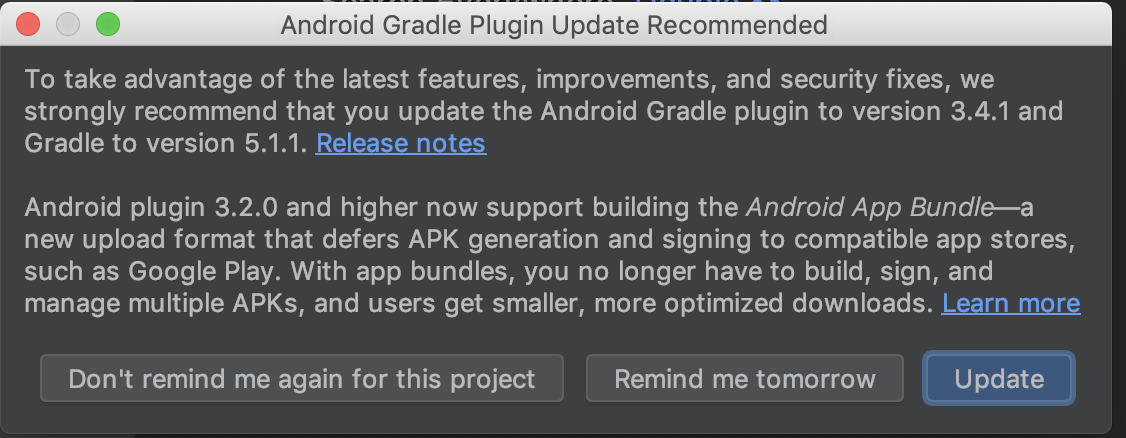
Developers usually prefer to have all packages and modules up to date. This message tells us that we are trying to use an old version – Gradle 3 instead of 5. In the Expo docs, you can see a recommendation not to upgrade, because if you do, Gradle version 5 will not support versions used inside ExpoKit. Skip the upgrade for now and press “Don’t remind me again for this project.” IDE will automatically build a new project, and you can run it on the simulator. After some time, you will see your project successfully shown in the simulator. Great!
Locally, everything seems to be working fine. Next, you’ll prepare the release and upload to your remote device. Expo documentation doesn’t help with this, but it’s very easy to do in Android Studio. Click on Build and then Generate Signed Bundle or APK, you will see this.
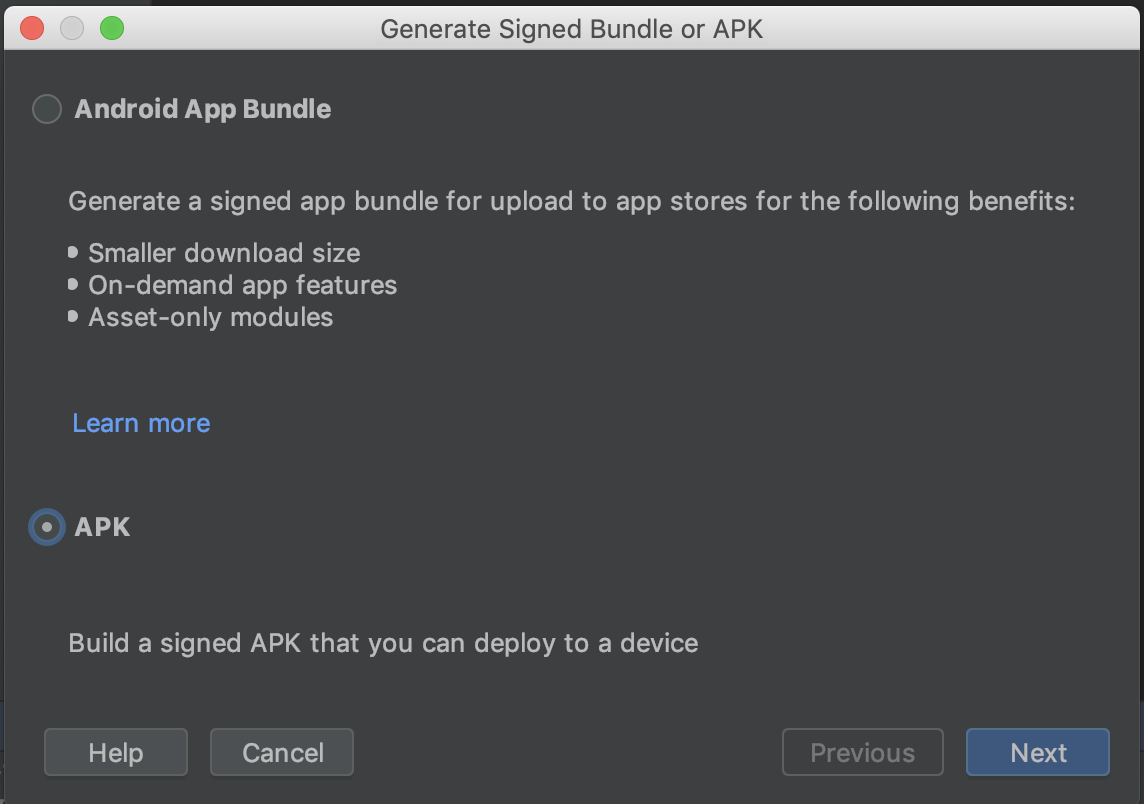
Choose APK. On the next page, you’ll paste the following.
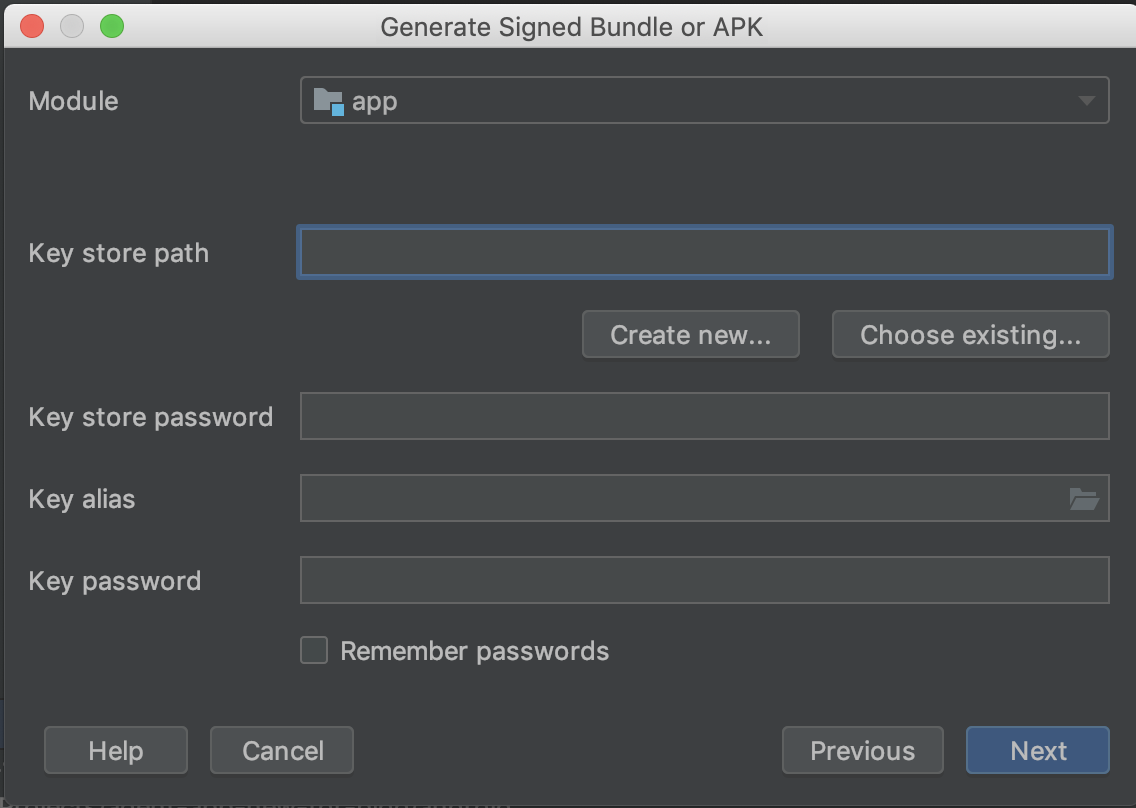
This Expo command helps continue the building process: expo fetch:android:keystore.
You will get a key store file on the root level of your project. You’ll see a password alias and key password in the terminal. Put them in and continue. The next step is to choose prodKenelRelease (version 33 – release) and check the two checkboxes for full APK and JAR. The process starts, and you will get your first error.

ENOENT is too long for the image – I will post it here also
ENOENT: no such file or directory, open ‘agent-app-new-for-blog/android/app/src/main/assets/shell-app-manifest.json’
Why did this happen? Everything was working in the simulator, but you don’t have shell-app-manifest.json in your project. You can spend several hours trying to find solutions. To generate these files, build the Android version from the Expo command line. If you don’t dismiss OTA updates, your clients will receive new changes.
If you’re not sure if the application will work correctly, you can make a new release channel. It’s pretty simple and will not cause any problems on the client side. You only need to add a new line in your package.json inside scripts. ![]()
Let’s run this command and check the Android folder again.
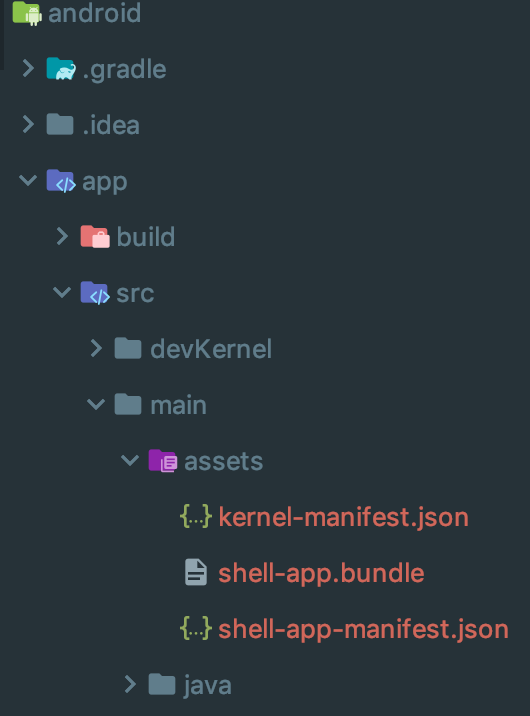
The necessary files have been generated! Perfect!
Let’s move to IDE for Android and try again to build our release APK. After some time, you will get a message that our release APK has been successfully generated.
I love iOS
You will not have any problems after ejection with iOS. All you need is Xcode and instructions from ExpoKit. Here are the instructions from the documentation:
“1) Make sure you have the latest Xcode.
2) If you don’t have it already, install CocoaPods, which is a native dependency manager for iOS.
3) Run pod install from your project’s ios directory.
4) Open your project’s xcworkspace file in Xcode.
5) Use Xcode to build, install and run the project on your test device or simulator. (this will happen by default if you click the big ‘Play’ button in Xcode.)”
To build IPA for the Apple Store, first, go to Product – Destination – Generic iOS device. Then, choose Product – Archive – and follow the steps to generate an IPA file. This shouldn’t cause any problems or errors. Don’t forget to apply the certificates required by the App Store.
Use native library
Now you can easily use any native module inside your application. To allow any native module, you should install it, link it, and install pods in the iOS folder. For Android, you only need to build the project again. For linking, React Native comes with universal terminal command link, for example: react-native link react-native-system-setting. After that, this module can be used in React Native code.
Conclusion
The process of ejection is pretty easy and simple. There could be some problems with Android, but nothing critical. Spending a few hours with ejection could save you a lot of money in the future. You can use simple React Native solutions and the entire React Native modules to build fast, complicated applications.
I think the right way to start with Expo is to build everything, let Expo work with certificates for Android and iOS for development and production builds, upload and test your project on the real devices through the App Store and Google Play, and then use ejection.
There’s a lot more we could have covered about new updates in Expo 33, but we hope this explainer for the Eject process will give you the confidence to try this powerful way to build native projects.
If you search for the team of React Native or React JS software developers, please do not hesitate contacting us.
Also, please note that Diatom team proposes a high level of the React Development Services and always ready to help you on your project!
