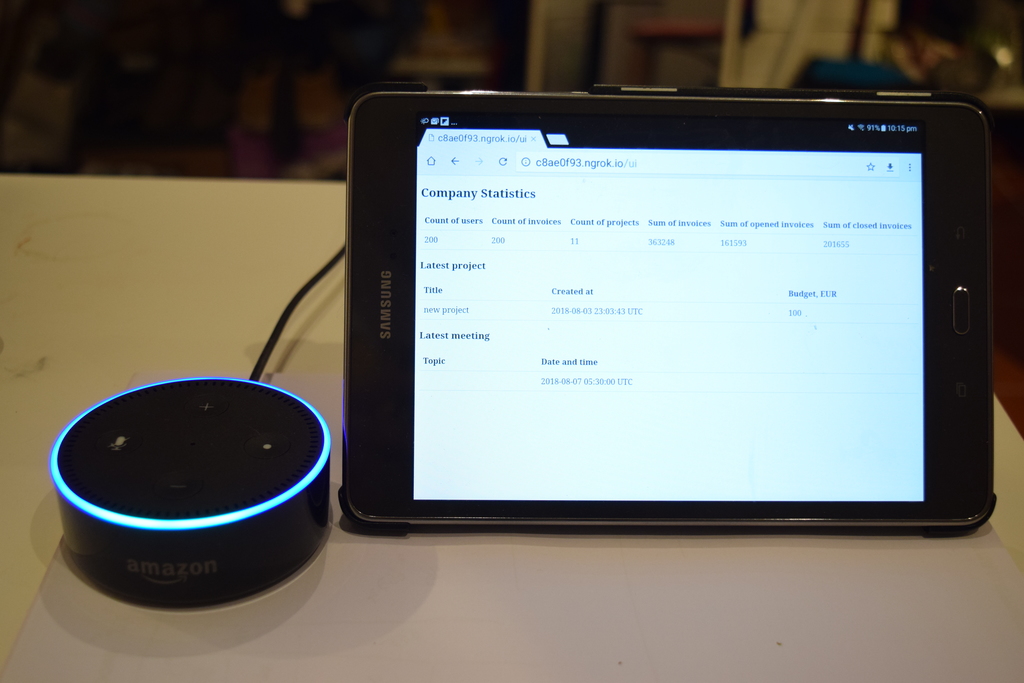
As programmers, many of us are interested in developing for different smart devices that we use at home every day. But what if we can also manage a whole business just by connecting our skills and these new technologies that we use at home? Voice assistants are popular nowadays because they can efficiently understand our commands, get information, give it back to us and easily work with other IoT devices. In this article, I want to show you how we can quickly set up a voice assistant to access data in a database. This is where Ruby comes in.
In the previous article, we showed you how a small Alexa device can improve your business processes and decrease the amount of time needed to get various statistics. Now I want to give you a closer look at exactly how it was built.
Let’s imagine that we have a company and are storing all of our data in a database. We keep orders, invoices, project descriptions, employee data, salaries and much more in order to have fast access to it from different departments.

Before reading further, it might be useful to see everything (commands, requests and responses) as a video explanation first
and then take a closer look at the implementation.
Preconditions
First of all, we need a database with any type of data: records about existent accounts, sales, invoices, projects and their connections, etc. Most companies store data to be able to provide statistics and calculations and work with it during different processes.
Usually, companies already have web applications that work with that data (e.g. administration, visualization, different time and task trackers, etc.).
To be able to access this data with Alexa, we first need to create and set a new skill on Amazon’s developer website. Amazon developers provide good documentation on how to do it in just a few steps. We also need to build an interaction model for our skill.
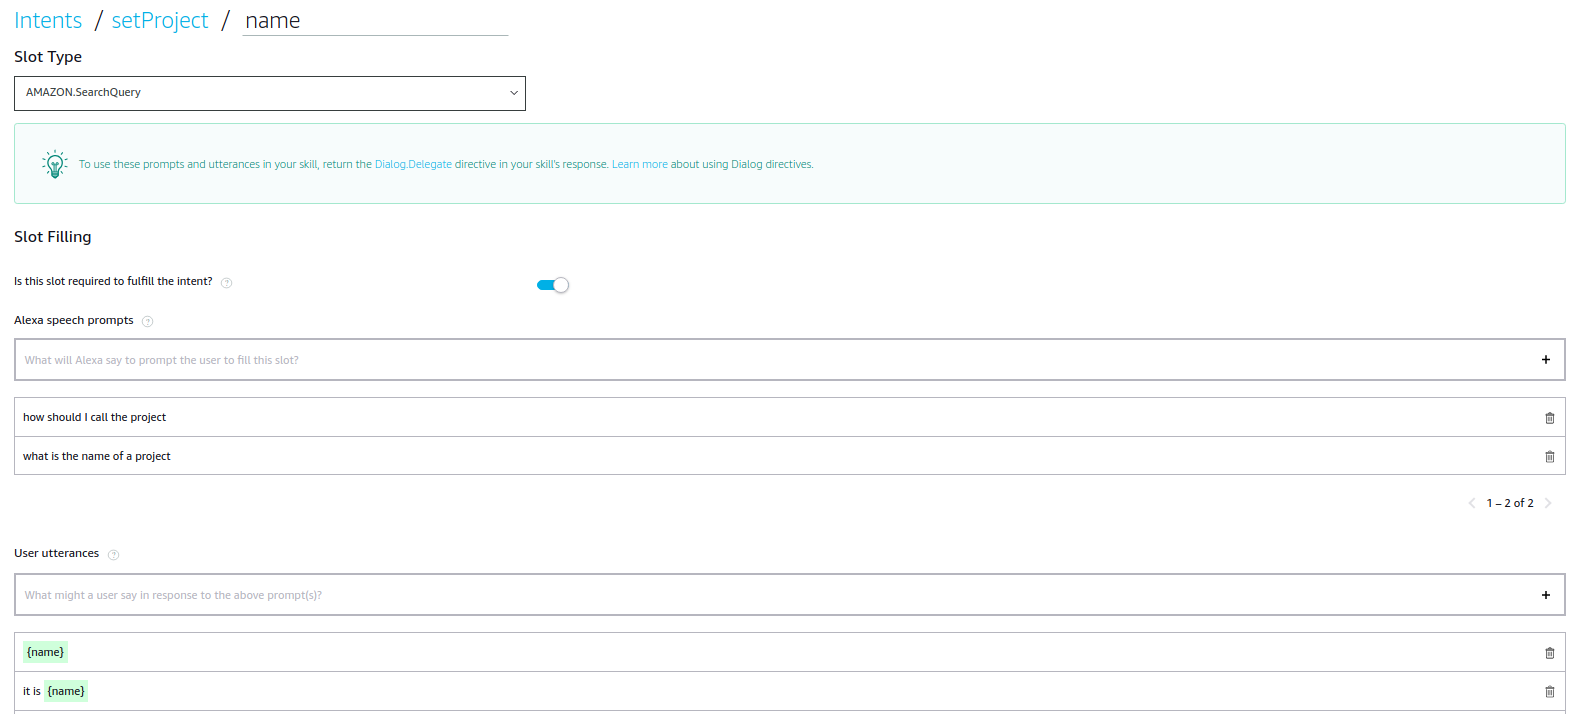
In the example that I used in the video, I created a big interaction model that you can copy here. In this article, we will only use the following intents: GetHelp, GetWorkingEmployeeAmount(AMAZON.DATE date), SetProject(AMAZON.SearchQuery name, AMAZON.NUMBER budget). You can clone my example.
But how do we force Amazon service to send requests to our local server during the development process?
Ngrok will help us here. Just follow the instructions and put the address that you see on your screen as your Service Endpoint on the Endpoint tab of your skill, like so:

I wrote a small server using Sinatra that handles Alexa’s requests that come from Amazon and are being tunneled by Ngrok to us. Next, I will describe how it works.
Implementation of ruby server
Our local server listens to Alexa’s requests on the standard for Sinatra, port 4567. Amazon then checks theEndpoint configuration and sends it to the configured route. In this specific example, it will be / path because I didn’t specify any other.
post '/' do
  hash = JSON.parse(request.body.read)
  RequestHandler.get_response(request: hash["request"]).to_json
end
As soon as we get a request, we send its body to RequestHandler class, which will decide what the request means and how our application should respond to it.
class RequestHandler
  attr_reader :response
  def initialize(request:)
    @request = request
    set_response
  end

  def self.get_response(request:)
    new(request: request).response
  end

  private
  attr_reader :request

  def set_response
    case request["type"]
    when "LaunchRequest"
      @response = make_default_response_schema("Welcome to your company assistant! How can I help you?")
    when "IntentRequest"
      @response = IntentSelector.get_response(request: request)
    end
  end

  def make_default_response_schema(text)
    {
      "version": "1.0",
      "response": {
        "outputSpeech": {
          "type": "PlainText",
          "text": text,
        },
        "shouldEndSession": false
      }
    }
  end
endLet’s turn on our Alexa device and tell her to open APPNAME
The RequestHandler class looks for attribute ‘type’ and tries to understand whether it is IntentRequest, LaunchRequest or something else. If it’s a launch request, as in this case, then it greets the user back using the default response schema.
Now let’s talk more about complex requests and ask Alexa to give us some assistance by saying: “Alexa, please get some help.” Alexa then sends us another request, where the body contains type IntentRequest.

As soon as our RequestHandler gets this type of request, we call IntentSelector class, which is responsible for finding intents and their definition in our application.
require 'active_support/core_ext/string'
class IntentSelector < RequestHandler
  private

  def set_response
    @response = find_intent_class.get_response(request: request)
  end

  def find_intent_class
    begin
      class_name = request["intent"]["name"].classify.constantize
    rescue
      class_name = FallbackIntent
    end
    return class_name
  end
end
As you can see, we are looking for the request request[‘intent’][‘name’] parameter that Alexa defines by parsing our phrase. In our case, it is a GetHelp intent. IntentSelector class checks if we have built a class called GetHelp, and if so, it returns a response that is defined inside and wraps it in the default response model.
class GetHelp < BaseIntent
  private
  def set_response
    @response = %Q( I'm your office assistant.
      You can ask me different questions like:
      How many employees do we have?
      Or how many employees are working on date?
      Also, you can set a meeting by saying Set meeting on date. )
  end
end
If we haven’t built the intent yet, Alexa will respond with the default response written in the BaseIntent class:
class BaseIntent
  attr_reader :response, :should_end_session, :response_schema

  def initialize(request:)
    set_defaults(request)
    set_response
    set_response_schema
    @response = response_schema
  end

  def self.get_response(request:)
    new(request: request).response
  end

  private
  attr_reader :request

  def set_defaults(request)
    @request = request
    @should_end_session = false
  end

  def set_response
    @response = "Unfortuntely, I don't know this one yet. Try to say get help to get additional help."
  end

  def set_response_schema
    @response_schema = default_schema
  end

  def default_schema
    {
      "version": "1.0",
      "response": {
        "outputSpeech": {
          "type": "PlainText",
          "text": response,
        },
        "shouldEndSession": @should_end_session
      }
    }
  end
end
Amazon also provides us with the opportunity to use variables in our communication. “Alexa, get the number of working employees for today” or “Alexa, please tell me how many people are in the office on Monday” will build a query containing the intent name and date parameter containing the current date or date on the next Monday, respectively.

IntentSelector catches the intent class, and in our case, GetWorkingEmployeeAmount intent gets the slot value by name, as described in the BaseIntent class.
class BaseIntent
  def get_slot_value(name)
    request["intent"].fetch("slots", {}).fetch(name, {}).fetch("value", nil)
  end

  def date_argument
    get_slot_value("date")
  end

  def date_range(date)
    date = DateTime.parse(date)
    date.beginning_of_day .. date.end_of_day
  end
end
After getting this value, you are free to use it in your response setter method:
class GetWorkingEmployeeAmount < BaseIntent
  private
  def set_response
    if date_argument
      amount = Account.where(last_checked_date: date_range(date_argument)).count
    else
      amount = Account.where(last_checked_date: date_range(DateTime.now.to_s)).count
    end
    date = date_argument ? date_argument : "current date"
    @response = "On #{date} we have #{amount} of people checked in the system"
  end
end
Furthermore, we can also use multiple variables. By default, Alexa’s API will not understand if you use more than one slot in your sentence, but you can change this behaviour by implementing a dialog structure in the code.
Let’s say we want to set up a project.

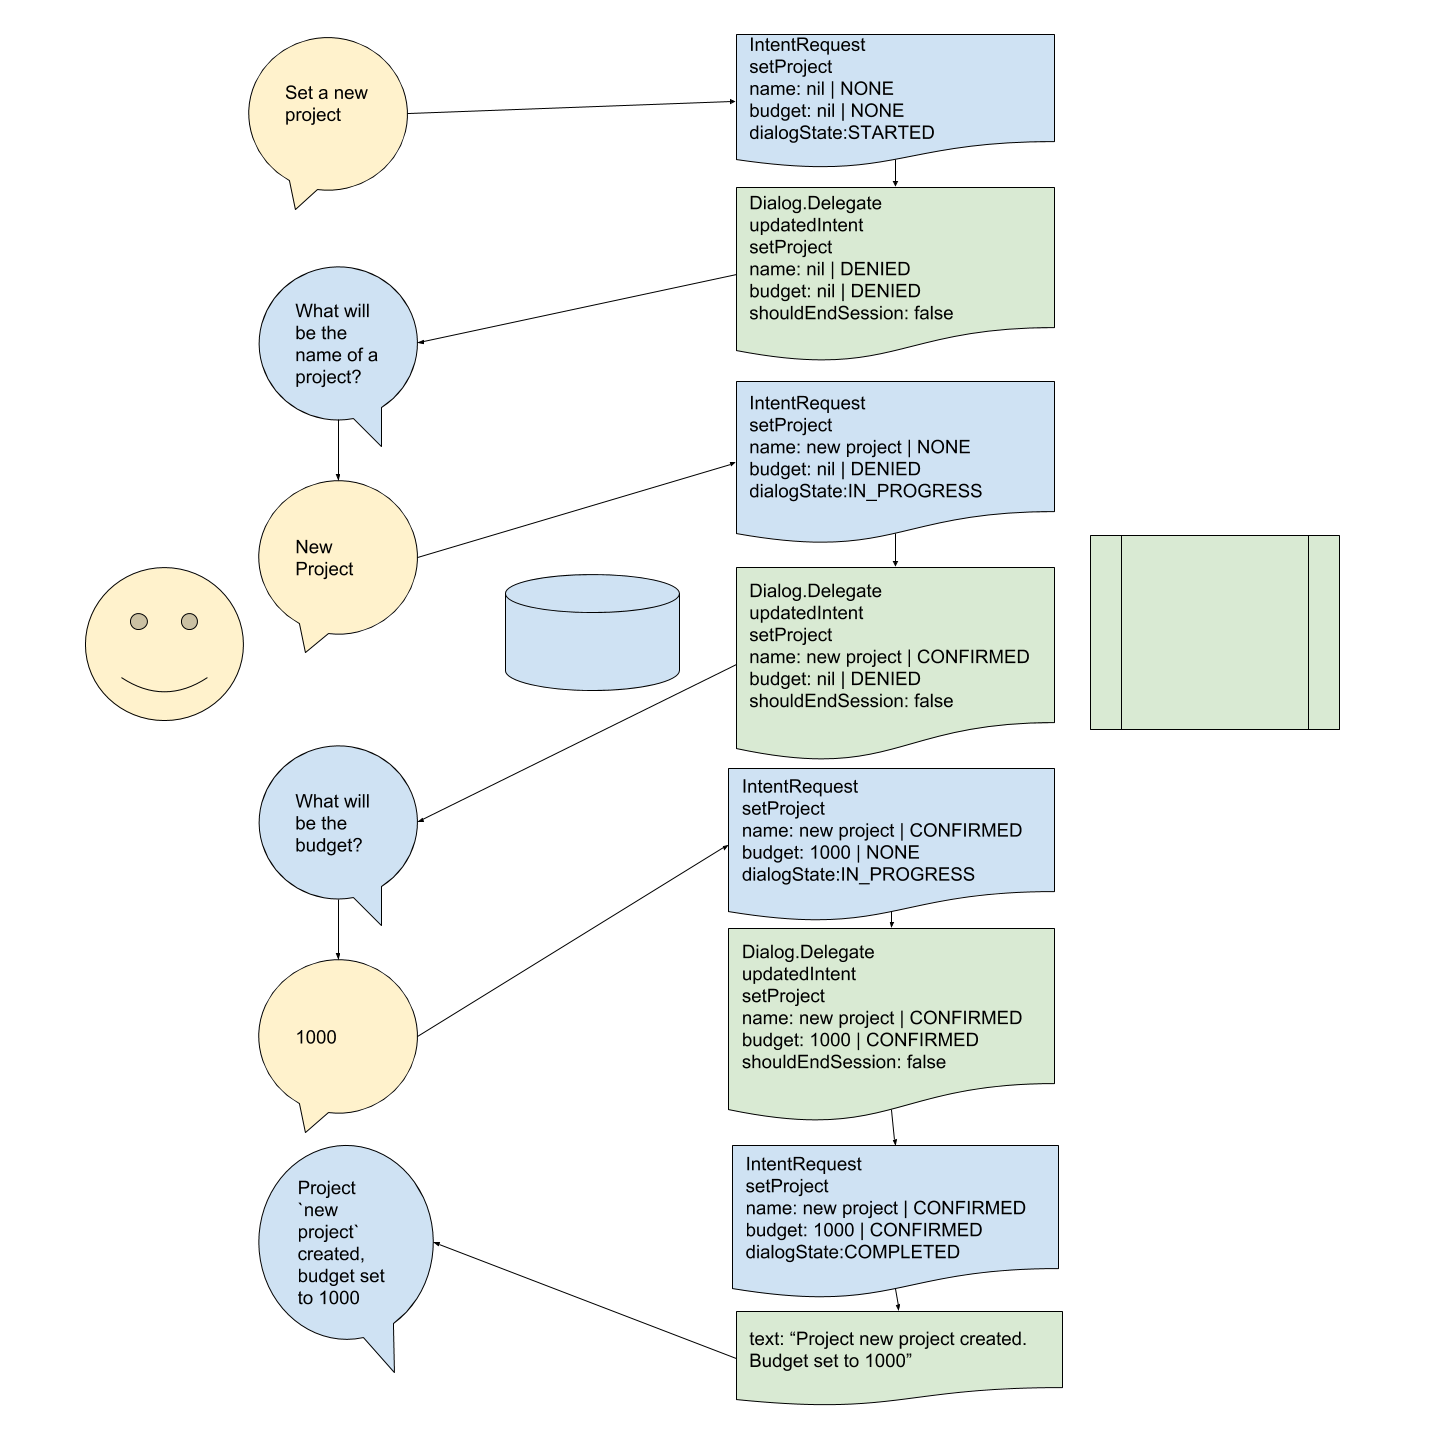
Alexa receives the request to create a project and will see that in our intent definition, we require a few variables. In this case, Alexa will send us a request to start the dialog. It will be the same intent request but with variable dialogState in params. This parameter can hold three states: – STARTED, IN_PROGRESS, COMPLETED.

When Alexa sends the STARTED state, it will tell our application that it will be a dialog and that we will need to check each variable’s value from our side. Initially, variables can be blank, so by default, we will DENY them or leave confirmation as NONE. We communicate this to Alexa by sending it back as Dialog.Delegate, which updates the intent setProject. Parameter updates point Alexa towards which intention we are working with. Alexa will check her list of required slots and will ask a question for each slot that have still not been approved on our side. Parameter updates point Alexa towards the intention we are working with. Alexa will check her list of required slots and ask a question for each slot that has not yet been approved on our side. After asking a question and getting a value, Alexa will send it to us to approve/deny, with the dialogState: IN_PROGRESS.
This action will be looped until we approve all the values for the required slots.
The whole cycle for SetProject intent will look like this:

After we send Alexa the last approved value, she sends us IntentRequest with all the parameters and values, marking them as APPROVED and changing the dialog state to COMPLETED. After this step, our application will know that Alexa has validated all the required fields and sent their values to us. We can take all these values and work with them however we like – create a project, send invitations, emails or SMSs, etc.
The SetProject class simply looks like this:
class SetProject < DialogIntent
  private

  def set_slots
    @slots = ["name", "budget"]
  end

  def proceed_results_and_response
    new_project = Project.create(title: get_slot_value("name"), budget: get_slot_value("budget"))
    @response = "Project #{new_project.title} created. Budget set to #{new_project.budget}"
  end
end
In set_slots method, we define the required fields that Alexa will ask us about; in proceed_results_and_response, we describe what we should do with the verified variables after the last step. This method works the same as set_response from the basic intent definition.
As you can see, this class has a parent called DialogIntent, where we built all the dialog logic and structure for building responses. It also calls set_response as the last step but can build dialog type responses and verify the variables. I wrote a simple implementation of DialogIntent. In my code, it approves all the values that are not nil or blank, but you can update the code by simply sending lambdas or patching the generate_slots method inside.
The dialog model is different from the normal response model, so while dialog is still IN_PROGRESS or just STARTED, we have to communicate with Alexa using a dialog syntax. When we receive COMPLETED state, we should send back a normal response using a response syntax.
Conclusion
In this article, I tried to cover all the main parts of building your custom skill and communicating with it using Ruby code as a server. My implementation is quite modest but gives a good base for you to create your own complex skills that will allow you to access different data, perform CRUD actions and use any of the modern gems that Ruby provides (e.g. when you need to generate a pdf by command and send it to a group of workers, push code to a branch by command or maybe connect to other electronic devices that you can control via different APIs.). The list of possible actions and tasks that you can complete using Alexa is limited only by your imagination.
GitHub repository of the project:
https://github.com/AKovtunov/alexa_ruby_demo
