Diatom Enterprises is a company providing Software Development Services using React Framework.
Usually, I travel a lot by car and make blog posts about it. And usually, readers ask me about the mileage, gas consumption, and other useful information. So I have decided to create a simple application, where I would be able to save all this information just in a few clicks, without any registrations, advertisements, and tracking applications. I’ve never written any Android application and I wanted to develop the app using the React library, so react-native was the best choice for me.
(*) More ReactJs app examples you may find in the following article:
Basic setups
I don’t want to write another guide about how to set up react-native and Android Studio. All the information about the installation steps is described here. Just don’t forget to turn on hardware virtualization (Intel VT-x or AMD-V) in the BIOS so the emulator can use KVM, if your system supports it.
Let’s create a new project with
react-native init project_name
react-native init gas_counter_map
And cd into it:
cd gas_counter_map
Now we have an empty project that we can build and test on our virtual mobile.
First, we need to run a virtual device.
If you haven’t copied the path to your emulator yet, you need to open Android Studio and run the virtual device from there. As soon as you do it, copy the command that starts the emulator from the console at the bottom of Android Studio. Later you can use this copied command to run your device.
/home/YOUR USER NAME/Android/Sdk/tools/emulator -netdelay none -netspeed full -avd Xperia
Then, if you haven’t launched React Native yet, let’s do it.
react-native start
And finally, we need to build our application’s code.
react-native run-android
If everything is OK, you should see an Android screen with the initial text on it.
Let’s modify our code now.
Configuring and using react-native-maps
Before taking the next steps, I suggest initializing a git repository and committing your code.
git init

git add .

git commit -m “Initial commit”
It will save your progress and later you will be able to undo your changes at any time.
I use react-native-maps package because it has been suggested as a stable map package for Android applications by react-native developers. The guide to set up the package is here.
Let’s add a component to our view.
<MapView />
And let’s add some style to it.
<MapView
  style={styles.map}
/>
And in styles section of index.android.js
map: {
  height: 150,
  alignSelf: 'stretch',
},
Let’s try it!
react-native run-android
At this step, we should see a working map on our virtual device’s screen.

If at this stage you see a blank grey space with a “Google” label, then you’ve missed the Google Maps API key configuration.
Now you may commit your changes.
Getting the current user’s location
At first, we need to request permission in AndroidManifest.xml
<uses-permission android:name="android.permission.ACCESS_FINE_LOCATION" />
Let’s define our variables in index.android.js under a class definition.
constructor(props) {
   super(props);
   this.state = {
     initialCoords: 'unknown', //<- Our coords
     gotGpsData: false,
   };
 }
counstructor() initializes the state with our given variables and their values.
For our GPS data we need to use a navigator.getCurrentPosition and navigator.watchCurrentPosition methods
getGpsData(){
   navigator.geolocation.getCurrentPosition(
     (position) => {
       this.setState({initialCoords: position.coords});
       this.setState({gotGpsData: true});
     },
     (error) => alert(error),
     {enableHighAccuracy: true, timeout: 20000, maximumAge: 1000}
   );

   navigator.geolocation.watchPosition(
     (position) => {
       var lastPosition = JSON.stringify(position);
       this.setState({initialCoords: position.coords});
       this.setState({gotGpsData: true});
       this.render();
     },
     (error) => {}
   );
 }
First, we are getting our user’s location, and then we are creating watcher for the changes in his location. If a user has changed his location, we are rendering view again with an updated map. If there were no errors, we are setting our gotGpsData boolean to true.
Let’s update our render() action with the new opportunities!
render() {
   if (!this.state.gotGpsData) {
     this.getGpsData();
     return this.renderLoadingView();
   }
   return (
     <View style={styles.container}>
       <MapView
         style={styles.map}
         region={{
           longitude: this.state.initialCoords.longitude,
           latitude: this.state.initialCoords.latitude,
           latitudeDelta: 0.5,
           longitudeDelta: 0.5,
         }}
       />
       <Text style={styles.instructions}>
         {this.state.initialCoords.latitude}
       </Text>
     </View>
   );
 }
}
What are we doing in this part of the code?
If the user hasn’t given access to his GPS coords or coords are not yet received, we are trying to get them again and calling renderLoadingView. We will talk about it later.
If we have got the user’s coordinates, we are creating a map widget with the user’s location.
Under the map, we will see user’s initialLatitude, so we will be able to check our watchers and other code.
latitudeDelta (the vertical distance represented by the region), and longitudeDelta (the horizontal distance represented by the region) can be set at 0.001 or as per your need. The larger the number, the larger the visible area around the place.
What about renderLoadingView?
Let’s update our boring view a bit and add ProgressBarAndroid to the import{} section.
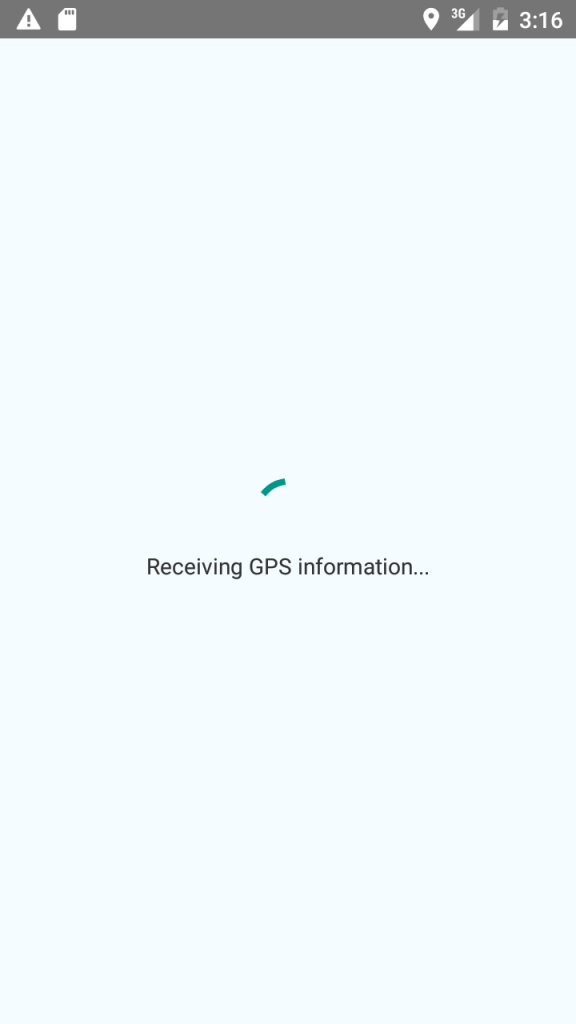
Now we can write a nice “loader” that the user will see until we receive any coordinates.
renderLoadingView(){
   return (
     <View style={styles.container}>
       <ProgressBarAndroid />
       <Text style={styles.instructions}>
         Receiving GPS information...
       </Text>
     </View>
   );
 }
Now you may want to commit your changes.
Inputs for prices and mileage
So, we are writing an application about prices, mileage and gas consumption, right? Then we need inputs for these data.
At first, we need to add a TextInput component to the import{} section of our application.
To create a basic input we can use a code like this:
<TextInput style={{height: 40, borderColor: 'gray', borderWidth: 1}} />
But how will we assign this data to a variable?
Let’s add some new variables to our constructor
constructor(props) {
   super(props);
   this.state = {
     initialCoords: 'unknown',
     gotGpsData: false,
     spentMoney: 0, // <- NEW
     filledLiters:0, // <- NEW
     droveMileage: 0, // <- NEW
     gotCoords: 'unknown',
   };
 }
And a callback on the input field change.
<TextInput
  style={{height: 40, borderColor: 'gray', borderWidth: 1}}
  onChangeText={(spentMoney) => this.setState({spentMoney})}
  value={this.state.text}
/>
At each change of the input, we will update our local variable and use it in our input. Good? Not yet!

All our data are digital. For a better UI, we can update our inputs, so that they show a numeric keyboard on each click by setting a keyboardType property:
<TextInput
  style={{height: 40, borderColor: 'gray', borderWidth: 1}}
  onChangeText={(spentMoney) => this.setState({spentMoney})}
  value={this.state.text}
  keyboardType={'numeric'}
/>
Let’s update our view with other inputs and captions.
render() {
    if (!this.state.gotGpsData) {
      this.getGpsData();
      return this.renderLoadingView();
    }
    return (
      <View style={styles.container}>
        <MapView
          style={styles.map}
          region={{
            longitude: this.state.initialCoords.longitude,
            latitude: this.state.initialCoords.latitude,
            latitudeDelta: 0.01,
            longitudeDelta: 0.01,
          }}
        />
        <Text style={styles.instructions}>
          Spent money
        </Text>
        <TextInput
          style={{height: 40, borderColor: 'gray', borderWidth: 1}}
          onChangeText={(spentMoney) => this.setState({spentMoney})}
          value={this.state.text}
          keyboardType={'numeric'}
        />
        <Text style={styles.instructions}>
          Filled-in liters
        </Text>
        <TextInput
          style={{height: 40, borderColor: 'gray', borderWidth: 1}}
          onChangeText={(filledLiters) => this.setState({filledLiters})}
          value={this.state.text}
          keyboardType={'numeric'}
        />
        <Text style={styles.instructions}>
          Mileage from the last point
        </Text>
        <TextInput
          style={{height: 40, borderColor: 'gray', borderWidth: 1}}
          onChangeText={(droveMileage) => this.setState({droveMileage})}
          value={this.state.text}
          keyboardType={'numeric'}
        />
        <Text style={styles.instructions}>
          {this.state.initialCoords.latitude}
        </Text>
      </View>
    );
  }
}

Now we can modify our map.
You may want to commit your changes and test them so we can proceed to the next step.
Adding price markers
Google Maps has a great tool called “markers” to point out the location. I suggest using this tool to point out the current user’s place. The react-native-maps examples include a “price marker” with which we will show our user how much he has spent and where.
First, we need to download a PriceMarker sample into our project’s folder, so that we could use it on our map.
the PriceMarker sample on GitHub
Next, we need to add it to our main project
import PriceMarker from './PriceMarker';
Then we can add this marker to our map and show the value of Spent Money variable. In order to do this you need to put this code inside <MapView style=”…”..> </MapView> tag:
<MapView style=”...”...>
   <MapView.Marker
      coordinate={this.state.initialCoords}
      draggable
   >
      <PriceMarker amount={this.state.spentMoney} />
   </MapView.Marker>
</MapView>
After building your project you should see something like this:


Now we are ready to save our data.
You may want to commit your changes and test them so we can go to the next step.
Saving current data
To save our current data, we will use AsyncStorage. It’s a simple, asynchronous, persistent, key-value storage system that is global to the app.
At first, we need to add AsycStorage to the import section
import {
 AsyncStorage,
…
}
Next, let’s update our state. We need a variable that will save records count from the database to work with IDs. Also, we need a lastRecords variable that will contain our previous records. And finally, we need a method that will synchronize our storage with the application on startup.
constructor(props) {
  super(props);
  this.state = {
    ...
    recordCount: 0,
    lastRecords: [],
    ...
  }
  this.syncStorage();
}
The syncStorage() method will be called on startup and will synchronize the current records and their count with the state.
syncStorage() {
  AsyncStorage.getAllKeys((err, keys) => {
    AsyncStorage.multiGet(keys, (err, stores) => {
      this.setState({recordCount: stores.length});
      this.setState({lastRecords: stores});
    });
  });
}
In this part of the code, at first, we are getting all of the keys that AsyncStorage contains.
Then, we are getting all the records by these keys.
Next, we need to create a method to save our data in storage:
saveData() {
  var saveData = {
    "longitude": this.state.initialCoords.longitude,
    "latitude": this.state.initialCoords.latitude,
    "spentMoney": this.state.spentMoney,
    "filledLiters": this.state.filledLiters,
    "droveMileage": this.state.filledLiters,
    "timestamp": Math.round(new Date().getTime() / 1000),
  };
  AsyncStorage.setItem("record_"+this.state.record_count+1, JSON.stringify(saveData)).then(
    this.setState({message: "Saved record #"+this.state.record_count+1})
  ).then(this.sync_storage()).done(
    this.render()
  );
}
AsyncStorage.setItem() sets a value for the key and calls the callback on completion.
I’ve added a timestamp in milliseconds, thus, we can get information about when we have done this record.
Now, let’s update our views:
<View style={styles.container}>
  <MapView>
    <MapView.Marker ...    > ...  </MapView.Marker>
    {
      this.state.lastRecords.map(function(item, index){
        item = JSON.parse(item[1])
        coords = { latitude: item.latitude, longitude: item.longitude }
        return (
          <MapView.Marker
            coordinate = { coords }
            draggable
          >
            <PriceMarker amount={item.spentMoney} />
          </MapView.Marker>
        )
      }.bind(this))
    }
  </MapView>
  …
  <TouchableHighlight
   activeOpacity={0.6}
   underlayColor={'white'}
   onPress={() => this.saveData()}>
    <Text style={styles.button}>Save</Text>
  </TouchableHighlight>
  <Text style={styles.instructions}>
    {this.state.message}
  </Text>
  <Text style={styles.instructions}>
    Your fuel consumption on this {this.state.droveMileage} km is {Math.round(this.state.filledLiters * 100 / this.state.droveMileage *100)/100} l/100km
  </Text>
</View>
We have added a cycle for generating markers inside the <MapView> tag. This part of code maps all previous records and creates markers on a map from them.
<TouchableHighlight> is a wrapper for making views respond properly to touch. The main part is onPress event that calls this.saveData() method.
this.state.message returns a message about successful save.
Finally, we calculate fuel consumption based on the mileage driven. We take the last time the user filled up the car and check how much fuel he has spent until now. Then we take the driven mileage and calculate his fuel consumption.
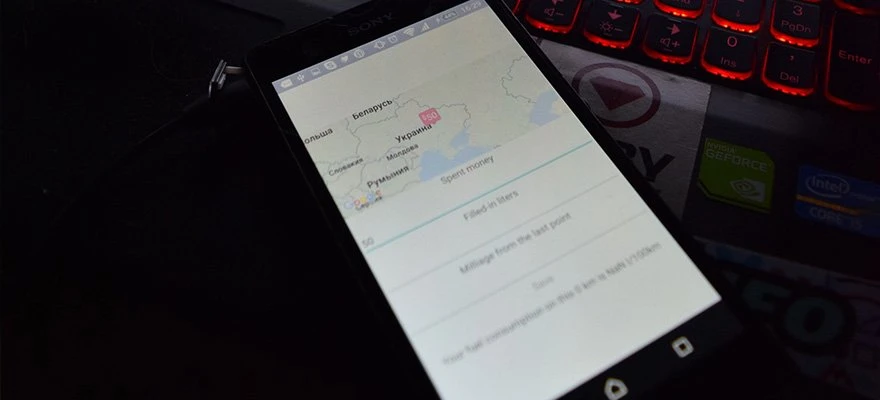
I think that my drive to Riga could look like this:


That’s it! Finally, don’t forget to commit your changes.
You can work with the saved data in any way: calculate all user’s expenses, mileage driven, average fuel consumption or create a swarm-like application.
In case you are not sure what the difference is between ReactJS and React Native:
React Native is a mobile framework that renders native platform UI components.
It allows you to build native mobile applications (iOS, Android, and Windows) in JavaScript.
ReactJS is a JavaScript library that is easy to use on the web.
Both were open-sourced by Facebook (now Meta) and, since February 2026, belong to the React Foundation at the Linux Foundation.
Update (October 2026): react-native init, used above, stopped creating projects on 31 December 2024 (see the React Native 0.75 release notes); the React Native docs now recommend a framework such as Expo, or npx @react-native-community/cli@latest init without one. The New Architecture has been the default since React Native 0.76 and the only one since 0.82. AsyncStorage and Geolocation have moved from React Native core to community packages, ProgressBarAndroid is deprecated, and react-native-maps is still maintained.
If you want to find a professional Custom Software development team in React, please do not hesitate to contact us.
More ReactJs app examples you may find in the following article:
Thank you for your time!